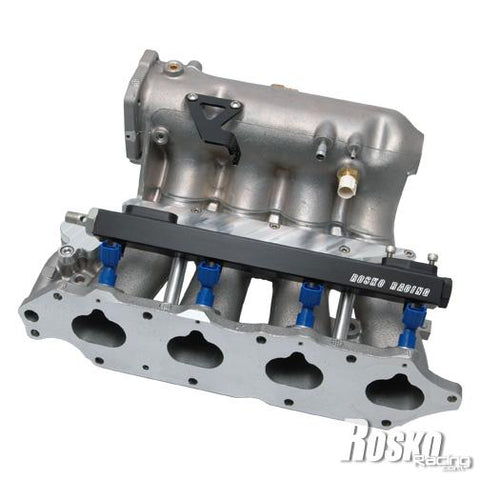
SO you just picked up a brand new Euro-R intake manifold and are wondering what to do now. There are several things to do to a new intake manifold and for this part we will be focusing on the actual manifold modifications.
These are the same modifications we offer as a service but can also be done, by you, at home with the correct tools and a bit of patience. If you want to skip the hassle we offer the service for sale .
The tools I use besides the CNC consist of an air powered die grinder, a good carbide cutting burr, cartridge sandpaper rolls, a #10-32 tap, a 3/8-16 tap, an 1/8-27 npt pipe tap and a 1/4-18 pipe tap.
First lets take a look at what we are working with. This is a brand new OEM bare Euro-R manifold out of the box. If yours is used or pulled off a swap this is what it will look like once you remove all of the OEM components from it. I recommend having these hot-tanked if they are used and dirty to clean them up. It makes things much easier to work with when they are fresh and clean.
There are several areas of the manifold we will need to address:
1.) Grind/machine clearance on the flange of the manifold
2.) Port out the injector area
3.) Plug the 4 air injection holes
4.) Plug the unused fitting on the front of the manifold
5.) Relocate brake booster fitting to the rear of the manifold
6.) Throttle inlet port matching
Step 1: Grinding clearance on the manifold flange.
The factory Euro-R cylinder head is cast slightly different from the typical blacktop H22 head. The typical H22 head has an oil passage that goes across the back of the head above the #3 and #4 intake ports. The Euro-R head is cast differently in this area and the actual flange of the manifold is a bit taller. When you go to install it the upper part of the flange interferes with the casting of the head. The solution is either to grind back an angle above the #3 and #4 ports on the manifold or some have simply used a thicker intake gasket to space the manifold away from the head. We do this part in the CNC but it can also be done by hand, either with a powered grinder or a hand file with a little effort. The import thing is that when the manifold is bolted up, no part of the flange interferes with the head.
Step2: Porting out the injector area.
Many people are confused by what this means. All we need to do here is modify the notch in the top of the port where the injector pokes into the runner. The short explanation is that the Euro-R’s OEM fuel injectors spray the fuel in a narrower pattern than an H22 injector. Therefore if not modified the H22’s injector spray pattern would interfere with the sidewall of the that opening. All we are going to do is open that up to replicate the port of a stock H22 intake manifold. I do this in the CNC as well when I machine the flange clearance of step 1. It is also easily done with a die grinder and a round porting bit. Don’t get crazy here. If you have a stock H22 intake manifold handy use it as a reference and duplicate the feature on the Euro-R.
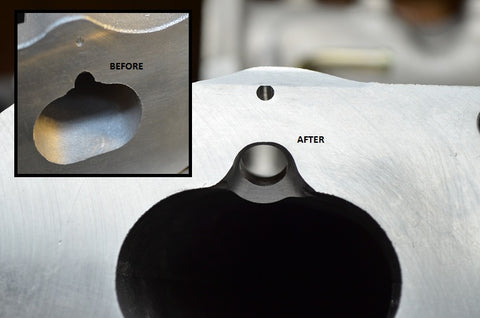
Step 3: Plugging the “Air Injection Holes”
The air injection holes are part of the Euro-R’s OEM 3 wire idle air control valve circuit. When the Euro-R manifold is paired with a Euro-R cylinder head and Euro-R intake gasket it creates a pocket of space between the manifold and head. These 4 air injection holes are fed by this pocket of space which is fed by the 3 wire iacv valve via the extra nipple on the underside of the intake flange. To truly make this all work you need to have the Euro-R cylinder head with these features incorporated into the casting, and also an OEM Euro-R intake gasket. Since 99% of these manifolds are installed on regular H series head using a 2 wire iacv, and there is no source for the true Euro-R intake gasket all of this becomes obsolete. All you need to do is plug these 4 little holes, use a regular H22 gasket and the 2 wire iacv valve with my adapter and you are on your way. These 4 little holes are the perfect size for a #10-32 tap and plug. I use a set screw as a plug and I loctite it into place. The set screw is a #10-32 and they are 1/4″ long. I install them so that they sit just below the surface. Be careful not to screw them in to far or they will interfere with your fuel injector.
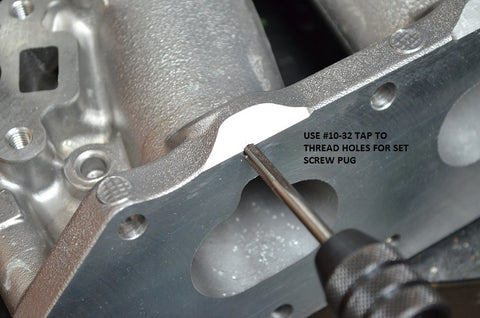
Step 4: Remove and plug unused fitting on front of manifold.
This fitting is not needed and can be removed and plugged. Typically they come out fairly easy, usually just by using visegrips and twisting. Applying heat sometimes helps too. Occasionally these will snap off and at that point they will need to be drilled out. To do so you can use a 5/16 drill bit but that is pretty rare. Usually they come right out and then all you need to do is tap this hole with a 3/8-16 tap and install a set screw plug. I do NOT tap this hole all the way into the the plenum however. Not doing so insures that the plug can never fall into the inside of the manifold. Simply tap it shallow and install the plug with Loctite and it should never be an issue.

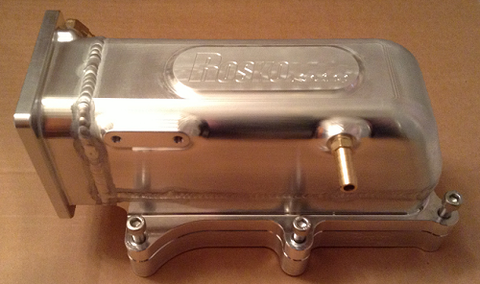
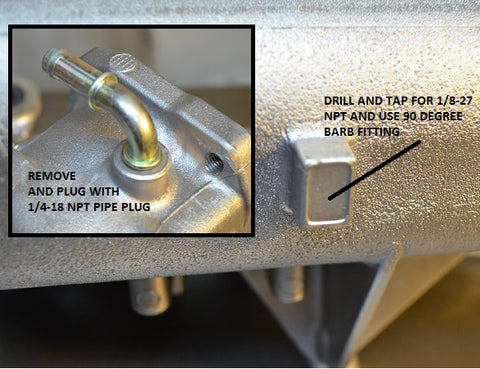
Step 5: Relocating the brake booster fitting.
The brake booster fitting on this manifold points toward the front of the manifold out of the box. You can either turn it towards your brake booster and run a longer hose, or you can remove and plug it, then add a tapped hole to the rear of the manifold which is what we will go over here. Doing it that way usually means it will work with the stock brake booster hose you already have. I use a small center punch to make an indentation, then use a smaller size drill bit to make a small hole, then chase it with the tap drill for 1/8-27 NPT with is 21/64, then tap with the pipe tap. The finished hole is not shown here but due to the small size of this boss it is important to get the hole centered up. I use a 90 degree fitting with a 3/8 barb.
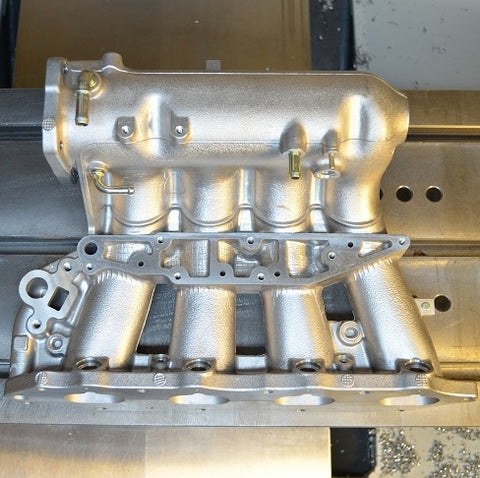
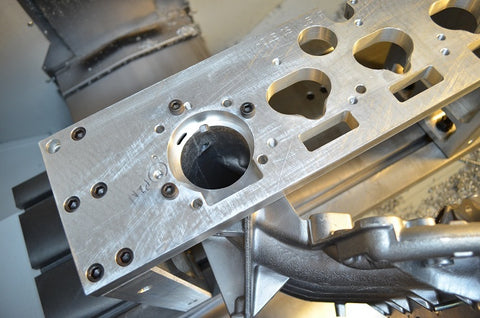
Step 6: Throttle body port matching.
The Euro-R can accept up to a 68mm throttle body without interfering with the IACV port. The factory throttle body size is 62mm and the manifold is cast slightly larger at about 63.5mm from the factory. Anything more than a stock 62mm throttle body and you are going to need to port match it to avoid a step from one diameter to the other. I do this in the CNC as well with my special fixture, but it can be done old school with a die grinder as well. Here is a shot of it in the CNC getting ready to be bored out:
Once you have all this done its very important to clean the manifold as thoroughly as possible. Especially if the manifold is used, there is often gunky oily residue inside that the metal shavings will stick to. Clean Clean Clean before going any further. Once clean you are ready to install you adapters and mate the manifold to the engine.